In this tutorial, we’ll show you how you can create tumblr-style animated text using Xara 3D Maker version 7 in just 7 simple steps.
If you’re familiar with the Tumblr and it’s bizzaro aesthetic, chances are you’ll have come across animatedtext. The blog, which is run by graphic designer Catherine Frazier, posts weird and wonderful animated GIFS that cast net-art phraseology in primary colours and 3D reminiscent of GeoCities.
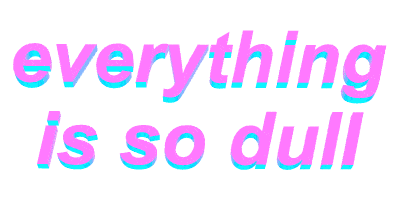
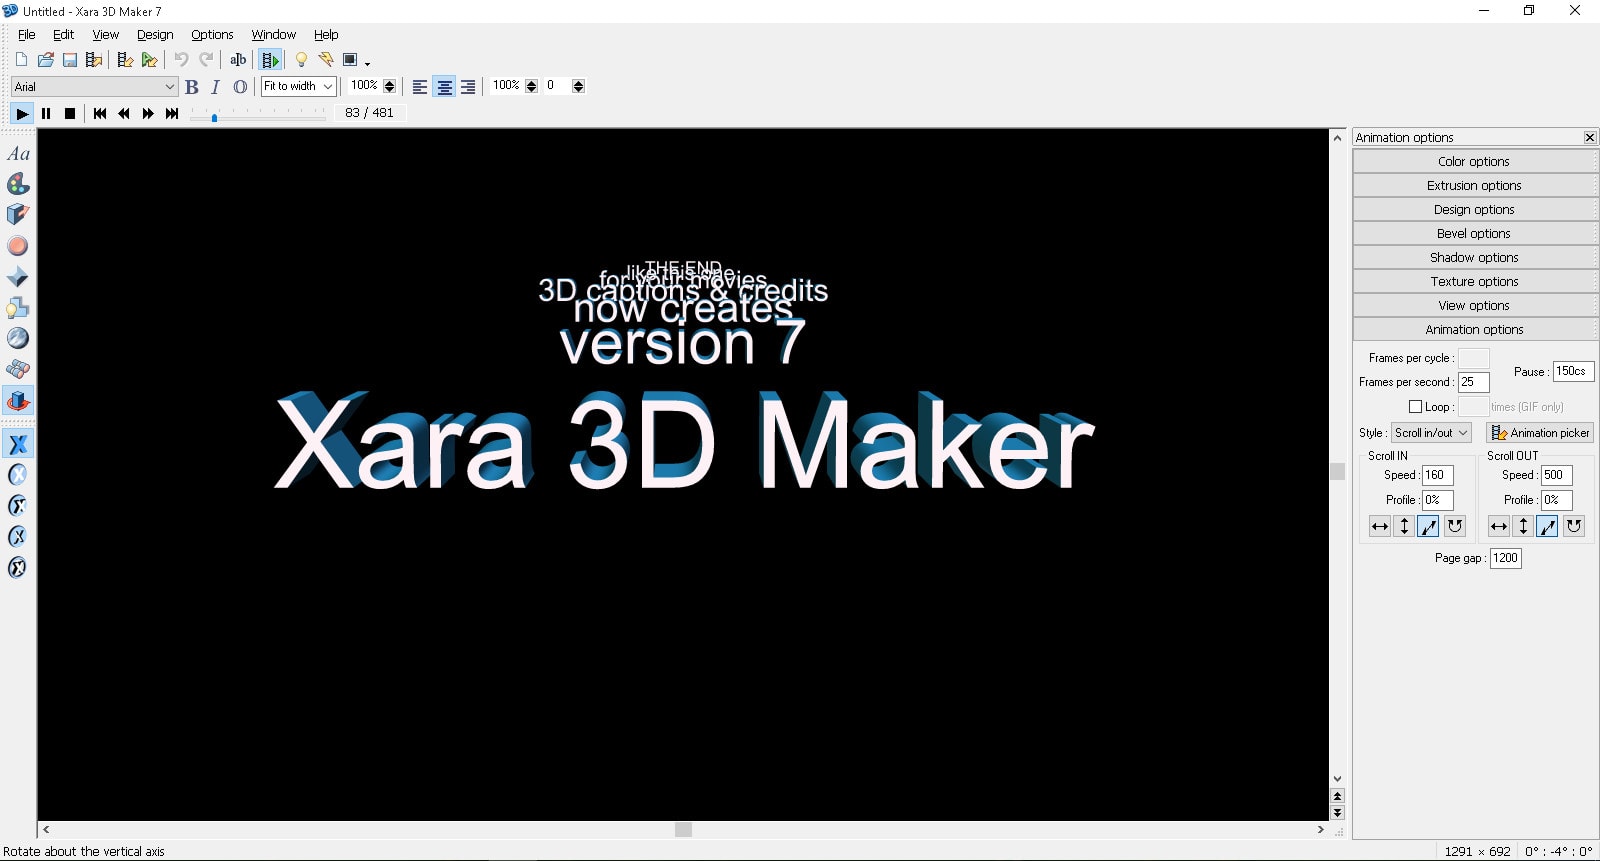
In this tutorial we’ll be showing you how you can create your own tumblr-style animated text GIFS in the easy-to-use Xara 3D Maker version 7. The end result should look something like this…
Step 1: Download Xara 3D
In this tutorial we’ll be using ‘Xara 3D Maker 7’, which you can download here. It is paid software but you can trial it for free by navigating to try now and clicking ‘Download’.
Step 2: Open Xara 3D
Xara 3D should automatically launch after install, if not, head to your installation folder, open it up and navigate to file > new.
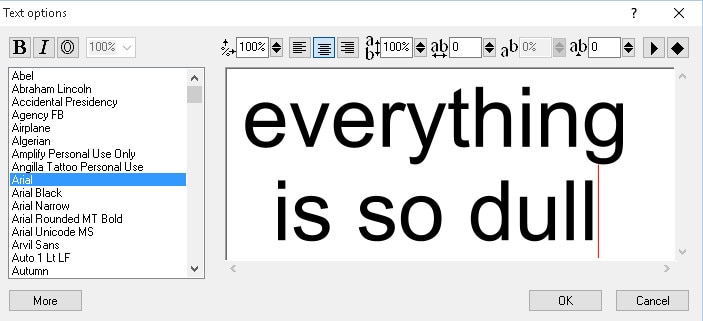
Step 3: Enter your Text
The first thing you’ll want to do is edit the default text. To do this, navigate to the left hand side panel and click the ‘Aa’ which will open the text options dialog box (alternatively you can use the shortcut alt + t). In this window you can select, delete and enter text.
For our tutorial we’ll be using Arial, with the options for Bold and Italic (that sit above the font list) selected.
When entering text, it will default to appearing on the same line. To break up a long string of text and lines, you need to hit shift + enter which creates a line break, so that text appers on two multlle line.
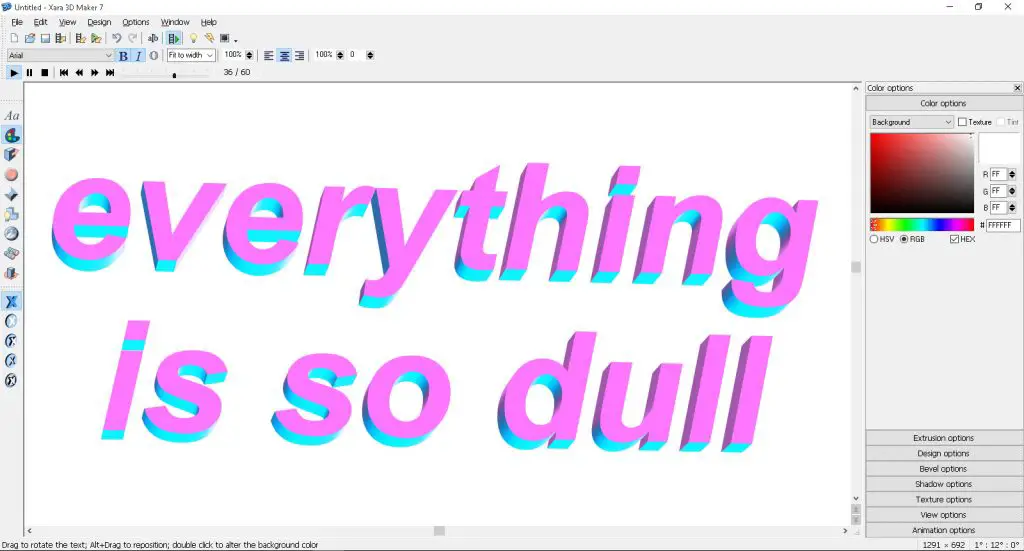
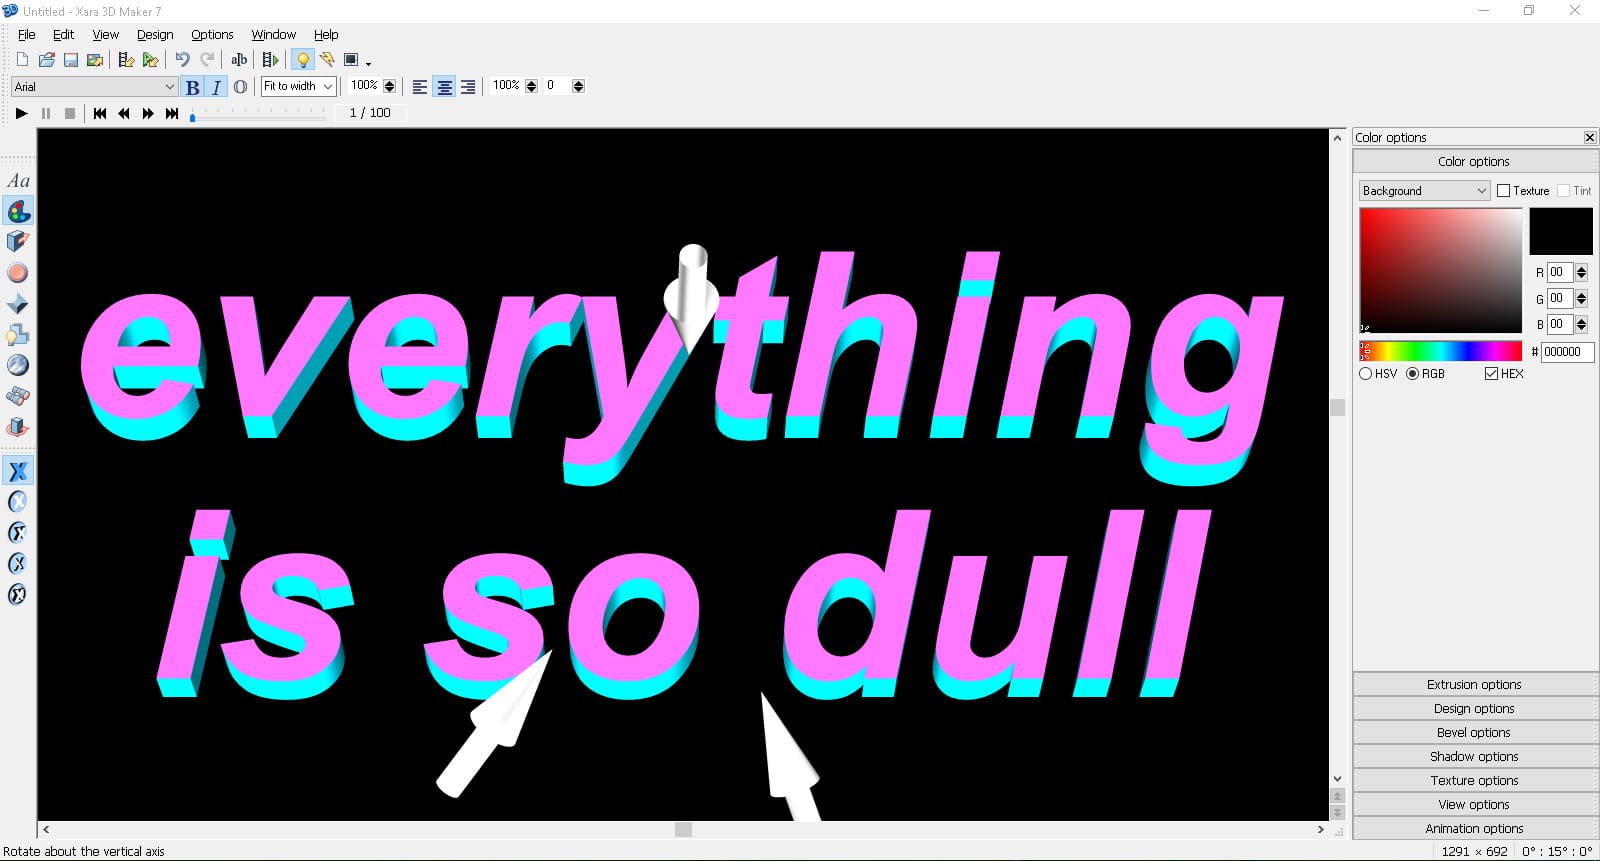
Step 4: Color Options
To adjust colouring and lighting, navigate to ‘color options’ which sits at the top of the ‘options bar’ panel on the right side of the Xara window. If this is not showing for you, you can toggle it on/off using alt + o. In this box you can play with different colour combinations and lighting options, which will update your text in real time.

If your text is looking a little dull and want it to appear more vivid and glossy, you need to play around with the lighting colours and angles. To do so, either press ctrl + tab or select the light bulb icon in the top bar, from here you can click and drag the arrows around the screen to adjust the direction of the light.
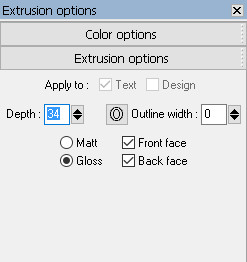
Step 5: Extrusion Options
Under ‘color options’ you’ll find ‘extrusion options’ which you can left-click to expand. In this panel you can adjust the depth, outline and texture of your text. For this tutorial, we’ll be using a depth of 34 with the gloss option checked which will give our text a shiny, chrome-like finish.
Step 6: Animation Options
You can find animation options at the bottom of the same panel as color and extrude options. In this box you can select between a long list of animation styles and adjust there parameters. This stage is very much a case of trial and error and we would encourage
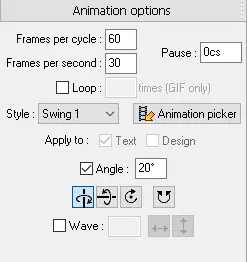
To preview and play your animation, you need to hit the play button that sits to to the left of the top bar. With this selected you’ll be able to better adjust the speed and angle of your animation to your liking using the frames per cycle, frames per second and angle options.

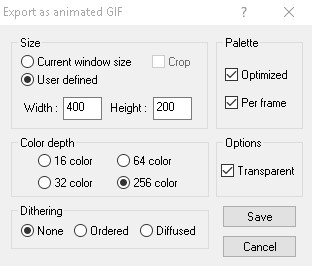
Step 7: Exporting to GIF
To export your animation as a tumblr-friendly GIF file, navigate to file > export animation and select your destination + name your file. In the next dialog box which appears, check user defined and specify the dimension of your GIF, keeping tumblr’s restrictions in mind (under 500 x 500 should be safe).