
In this simple tutorial we will show you how to create color swatches from an image in Photoshop CS6 and CC in just 6 steps.
Color swatches in Photoshop let you save colors that you like and group them into handy palettes. You can automatically set a foreground colour by clicking on any of squares in the swatch, speeding up your workflow and helping you to achieve a uniform aesthetic across multiple projects.
In this easy-to-follow tutorial, we will see show you how to pick out colors from an image and save them into a new, custom color swatch.
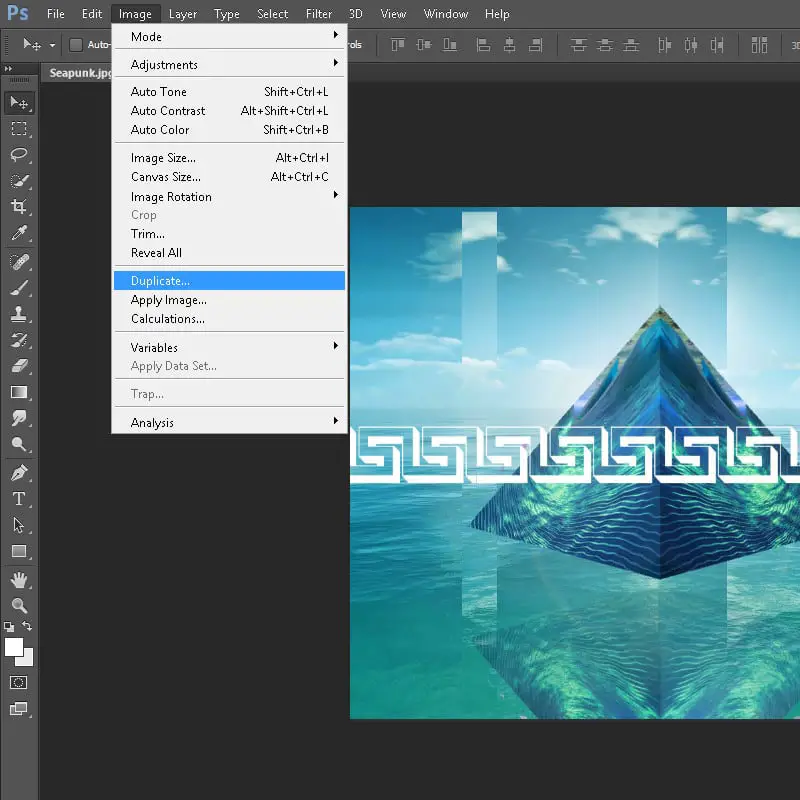
Step 1: Open up your image and duplicate
Load up your image in Photoshop. It’s always a good idea to work on duplicates of your original files and you may find your image looking pixelated by the end of the process, so to make a copy by navigating to Image > Duplicate.
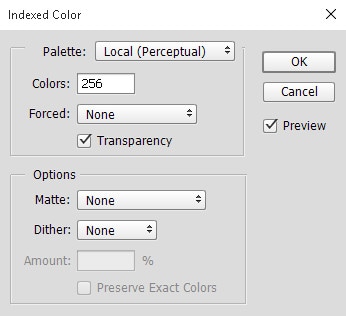
Step 2: Convert your image to indexed color mode
To reduce the number of colors in the image choose Image > Mode > Indexed Color. If your image is in CMYK mode, you’ll need to convert it to RGB and then Indexed.

Step 3: Reduce number of color in the image
In the Indexed Color dialog box, set the number of colors to the number of colors that you want in your swatch, for our demo we’ve chosen 256 but if you want only a few key colors from the image, set the number of colors to 16. Set forced to none and dither to none, then click OK.
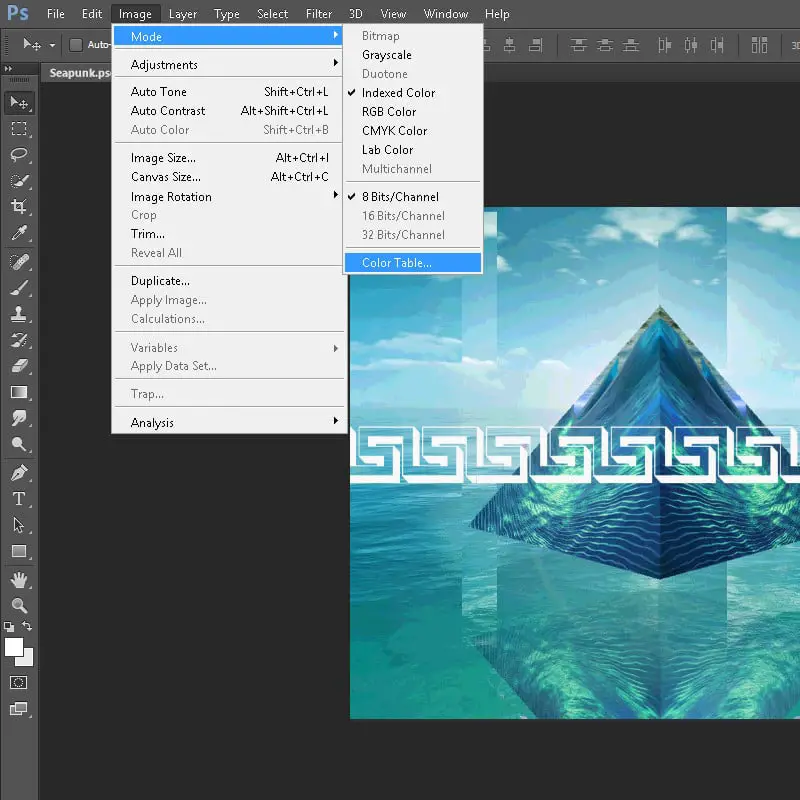
Step 4: View your color table
Now you will be able to see the color table that was created when you converted to your image to Indexed Color. Choose Image > Mode > Color Table to view it and the colors that have been selected from your image.
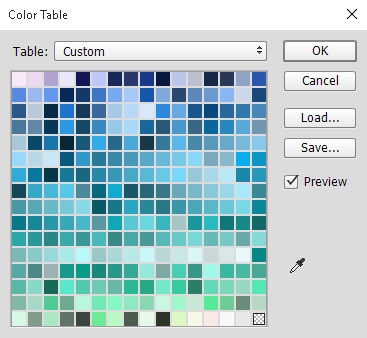
Step 5: Save your color table
Now you can save the table, otherwise you’ll lose the new palette you’ve created. Hit the Save button on the Color Table dialog box and then save it into Photoshop > Presets > Color Swatches folder.
Step 6: Load your Color Swatch
To load up your new colour pallete, navigate to the the drop down menu in the top right corner of your swatches panel. Selecte load swatches from the drop down menu and browse to the folder where you saved your color table and open it. Palettes can be saved as .ASE, .ACT or .ACO so make sure you are searching for the file format that you saved you swatches in.
Photo Editing Tutorials
If you liked this short tutorial and would want to learn more basic tips and tricks in photo editing, check out our posts on how to Enlarge Pixel Art Without Blurring In Photoshop, How to create glitch photos, and How to choose the right content for graphic design on any subject